Posted By

Security is now in the driving seat of any software development process. Organizations are adopting shift-left strategies to integrate security into every phase of software development. As security has become imperative, developers are looking for newer tools to enable secured development. Identity and Access Management is one of the areas where platforms like Keycloak make integration of security simple and easy. Keycloak is a single sign-on software for web apps and RESTful web services that provides customizable user interfaces for login, administration, registration, and account management. Moreover, it includes security features tailored to the organization’s requirements.
Keycloak has made it possible to import and export the entire database from one environment to another or migrate to a different database. Import and export in Keycloak are triggered at server boot time, and parameters are passed in through Java system properties. In this blog, I will explain step-by-step how you can import/export Realm, a database by MongoDB, in Keycloak. But first, let’s see why you may need to export/import Realm in Keycloak.
For platform engineers and IT architects managing Keycloak across multiple environments — development, staging, and production — realm import and export is not just a convenience feature. It is a critical part of your environment parity and disaster recovery strategy. Without a reliable realm backup process, a misconfiguration or failed deployment can mean manually recreating users, roles, clients, and group mappings from scratch. That is a significant operational risk, especially in enterprise setups where Keycloak is the central Identity and Access Management layer for multiple applications. Getting this process right and automating it as part of your deployment pipeline is worth the upfront investment.
Why do you need to import and export a Keycloak realm?
Realm performs the task of managing a set of users, roles, credentials, and groups. Realm databases are usually isolated and can only manage and authenticate the users they control. The primary reason to export/import Realm is to keep a backup of the current setting. With the assistance of this feature, you can back up the current setting and restore it whenever required. You can also track the older settings using this functionality. Moreover, these backed-up settings can be shared with other users for initial setup. You can store/share/upload the export settings of the Realm on Git for global use. This is also the most reliable approach for Keycloak realm migration between environments — exporting from staging and importing into production ensures configuration consistency without manual re-entry.
How do you install Keycloak before setting up realm import and export?
There are multiple ways to install Keycloak 15.0.2; you can use Dockerized Keycloak or download a RAR file and run it on the server. Here is a guide to Keycloak installation and customizing the login pages in Keycloak.
Now let's see how you can export and import Realm in Keycloak.
-
Export Realm
After logging in, click on the export button present in the left corner.
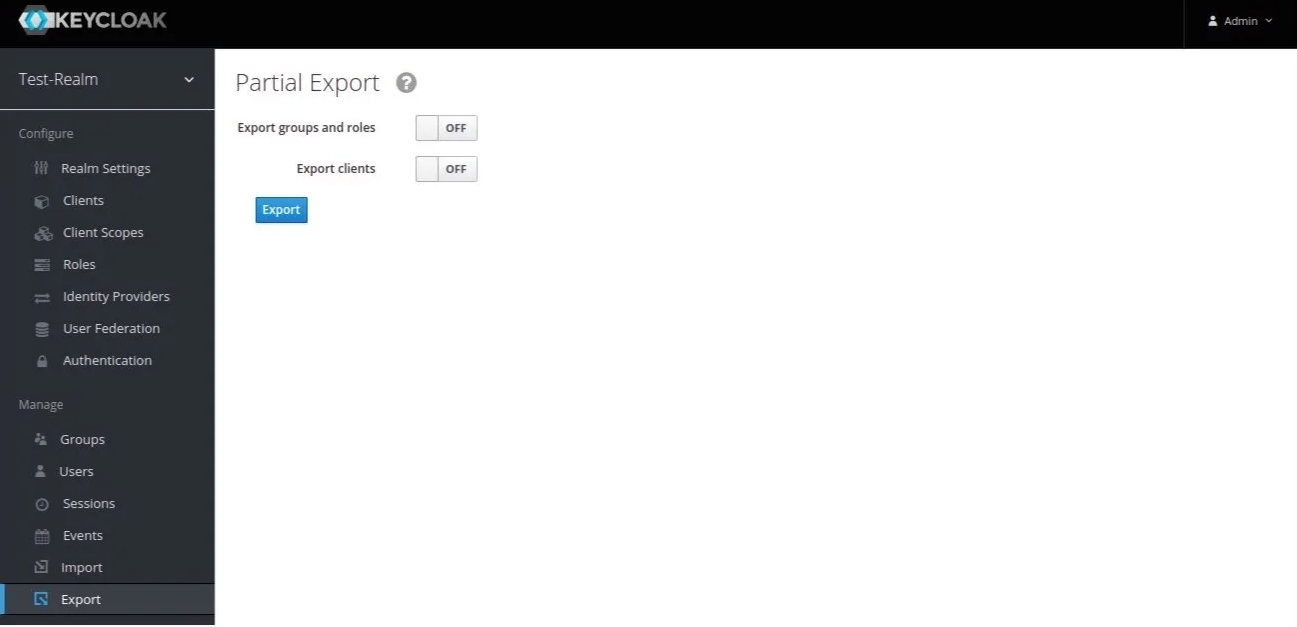
After clicking Export, you can see the following options:
Export groups and roles: To add available groups and roles in your exported file.Export clients: To add available clients in your exported file.
Now, turn on the Export groups and roles and Export clients.
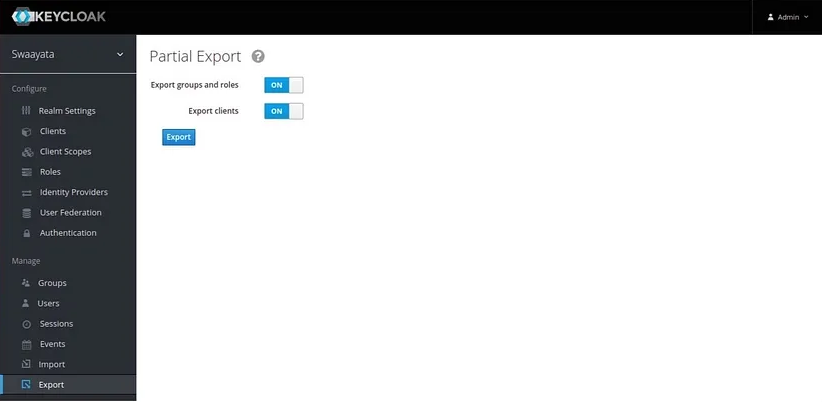
You can export the realm.json file on the local machine by clicking on the Export button. The exported realm.json file contains all your realm configuration — clients, roles, groups, and authentication flows. This file is your realm backup and can be version-controlled in Git for tracking configuration changes over time.
-
Add Custom properties file
Before importing the realm.json file in Keycloak, you need to create a profile.properties file. Create a profile.properties file with the following command:
profile=preview
feature.upload_scripts=enabled
and move it to the following location:
keycloak/standalone/configuration/profile.properties
-
Import Realm

Click on the Import and select your realm.json file. After selecting the file, you can see the options as shown below:
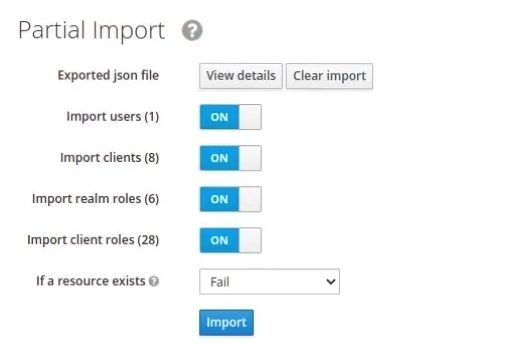
Import users: To import users from the realm.json file.
Import clients: To import clients from the realm.json file.
Import realm roles: To import available realm roles from the realm.json file.
Import client roles: To import available client roles from the realm.json file.
If a resource exists: To select options from the drop-down list.

When migrating a Keycloak realm between instances or Keycloak versions, the 'If a resource exists' setting is the most important decision you need to make — it determines whether conflicting data is skipped, merged, or overwritten.
The drop-down list options and their functional meanings are as follows:
1] Fail: If any minor error occurred, it would not import anything.
2] Skip: If it gets an error, it will skip and move forward.
3] Overwrite: Removes the existing Realm and imports the Realm again with new data from the selected file.
After you have selected the options, click on the import button.

Whether you're doing a full Keycloak realm migration to a new server or just maintaining a top-level backup of your current identity setup, this import/export workflow covers the most common scenarios teams run into.
This is how you can import/export Realm in Keycloak. Importing and exporting Realm in Keycloak is fairly simple. In today's fast-paced business environment with an increasing need for security, a proper authorization and authentication tool can help a lot. Keycloak helps you integrate security into your applications. I hope the blog will help you import and export the database out of Keycloak in the easiest way. Try it out or contact Opcito’s experts if you need further support.