Posted By

In my last blog, I discussed how you could set up autoscaling infrastructure using Ansible AWX for AWS autoscaling group configuration and deployment. You can use this to update your existing autoscaling groups as well without touching user data. In this blog post, I will mainly focus on what value you can add with Ansible AWX and how it can help you to manage your infrastructure in better ways.
Before diving deep into the possibilities with Ansible AWX, here are the highlights from my previous blog:
- Steps to configure Ansible-AWX with tower-sync utility
- Start AWX stack using Docker Compose
- Set up Ansible Projects
- Set up Job Templates
- Set up Credentials.
Ansible AWX is built to run on top of the Ansible project, enhancing the already powerful automation engine. AWX adds a web-based user interface, job scheduling, inventory management, reporting, workflow automation, credential sharing, and tooling to enable delegation.
Organizations and Teams.
The most important aspect of AWX is, it enables you to create users and group them into teams. You can then assign access and rules to inventory, credentials, and playbooks at an individual level or team level. This makes it possible to set up push-button access to complex automation and control who can use it and where they can run it.
For example, when developers need to set up a new environment, they don’t need to add another task to the already overbooked schedule. Instead, they can empower them to log into AWX and run the provisioning playbook on their own. You can even configure AWX to prompt for parameters, providing sane defaults and reasonable choices. To achieve delegation across your infrastructure management and DevOps teams, setting up proper organizations, users, and teams is very important. How can you set up organizations, users, and team with Ansible AWX? Here is your answer:
Setting up Organizations:
Organization is a logical collection of Users, Teams, Projects, and Inventories and is the highest level in the Ansible AWX object hierarchy.

- To create Organization, go to the “Organization” menu on the left side.
- Add new Organization.
- Fill in the required information to configure your Organization.

Organizations can be searched by Name or Description. You can modify and remove organizations using the Edit and Delete buttons. Ansible AWX creates a default organization automatically with the initial setup. You can create as many organizations as you want. Organizations help you to create workflows and processes within your team or projects.
Setting up Users:
A User is someone who has access to Ansible AWX with associated permissions and credentials.
-
To create a User go to the menu on the left and click on the “Users” tab (Please refer images below).
-
Add a new User.
-
Fill in the required information to configure your User.
There are three types of Tower Users that can be assigned from the Create User screen:
-
Normal User: Normal Users have read and write access limited to the resources (such as inventory, projects, and job templates) for which that user has been granted the appropriate roles and privileges.
-
System Auditor: Auditors implicitly inherit the read-only capability for all objects within the Tower environment.
-
System Administrator: Administrator (also known as Superuser) has admin, read, and write privileges over the entire Ansible AWX. A System Administrator is typically responsible for managing all aspects of Ansible AWX and delegating responsibilities for day-to-day work to various Users.

-
You can click on the tabs shown in the “Edit User” screen and select the required Organizations, Permissions, and Team, which you need to configure for the newly added User.
- A specific user can have the following:
- Job Templates
- Workflow Templates
- Projects
- Inventories
- Credentials
You can update and modify Users and it’s organizations, permissions, and teams anytime with edit functionality.

Setting up Teams:
A Team is a subdivision of an organization with associated users, projects, credentials, and permissions. Teams provide means to implement role-based access control schemes and delegate responsibilities across organizations. For instance, permissions may be granted to a whole Team rather than each user on the Team.
- To create a Team click on “Teams” in the menu
- Add new Team, just the way you added new Users in the previous step.
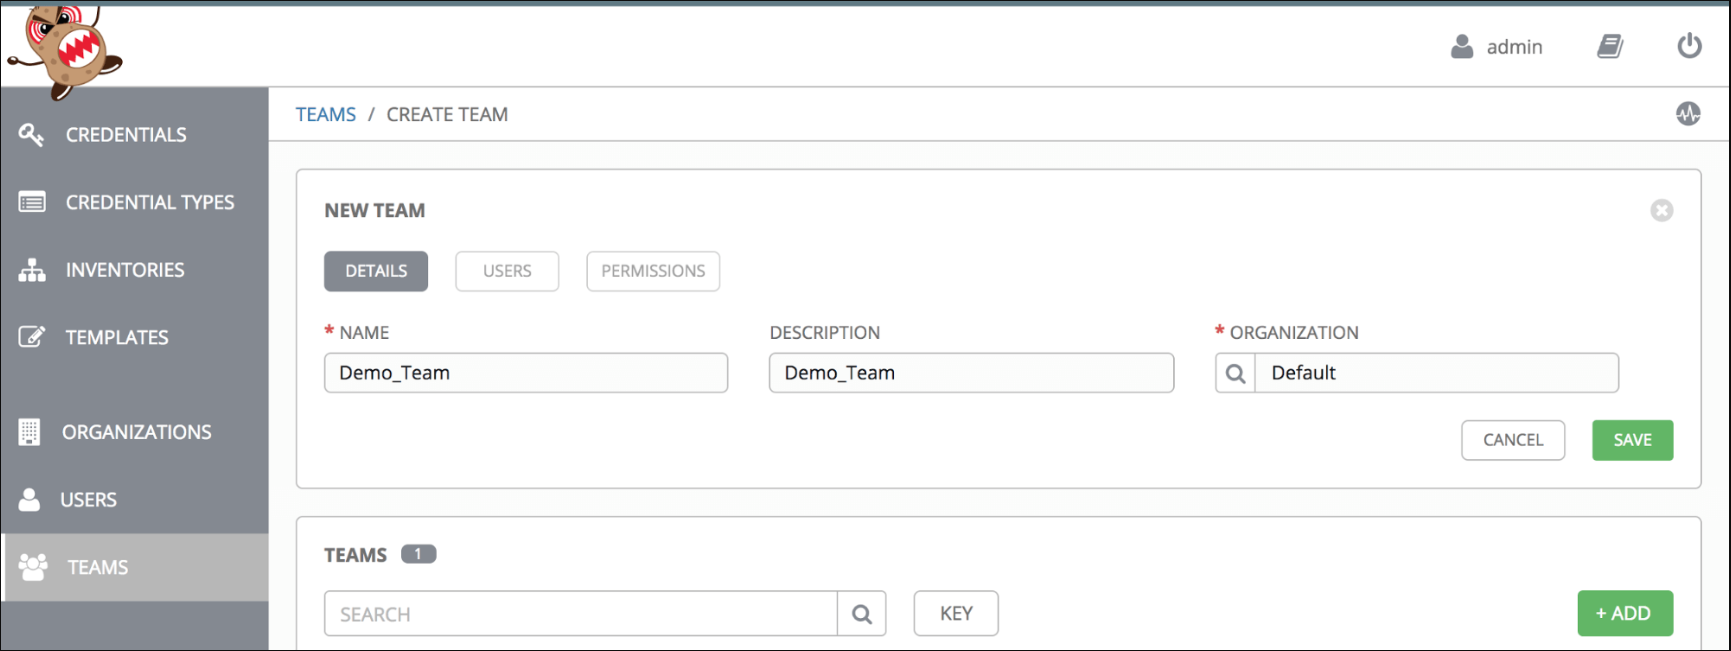
You can create as many Teams of users as you want for your Organization. Each Team can be assigned permissions, just like Users. Teams can also scalably assign ownership for Credentials, preventing multiple Tower interface click-throughs to assign the same Credentials to the same user.
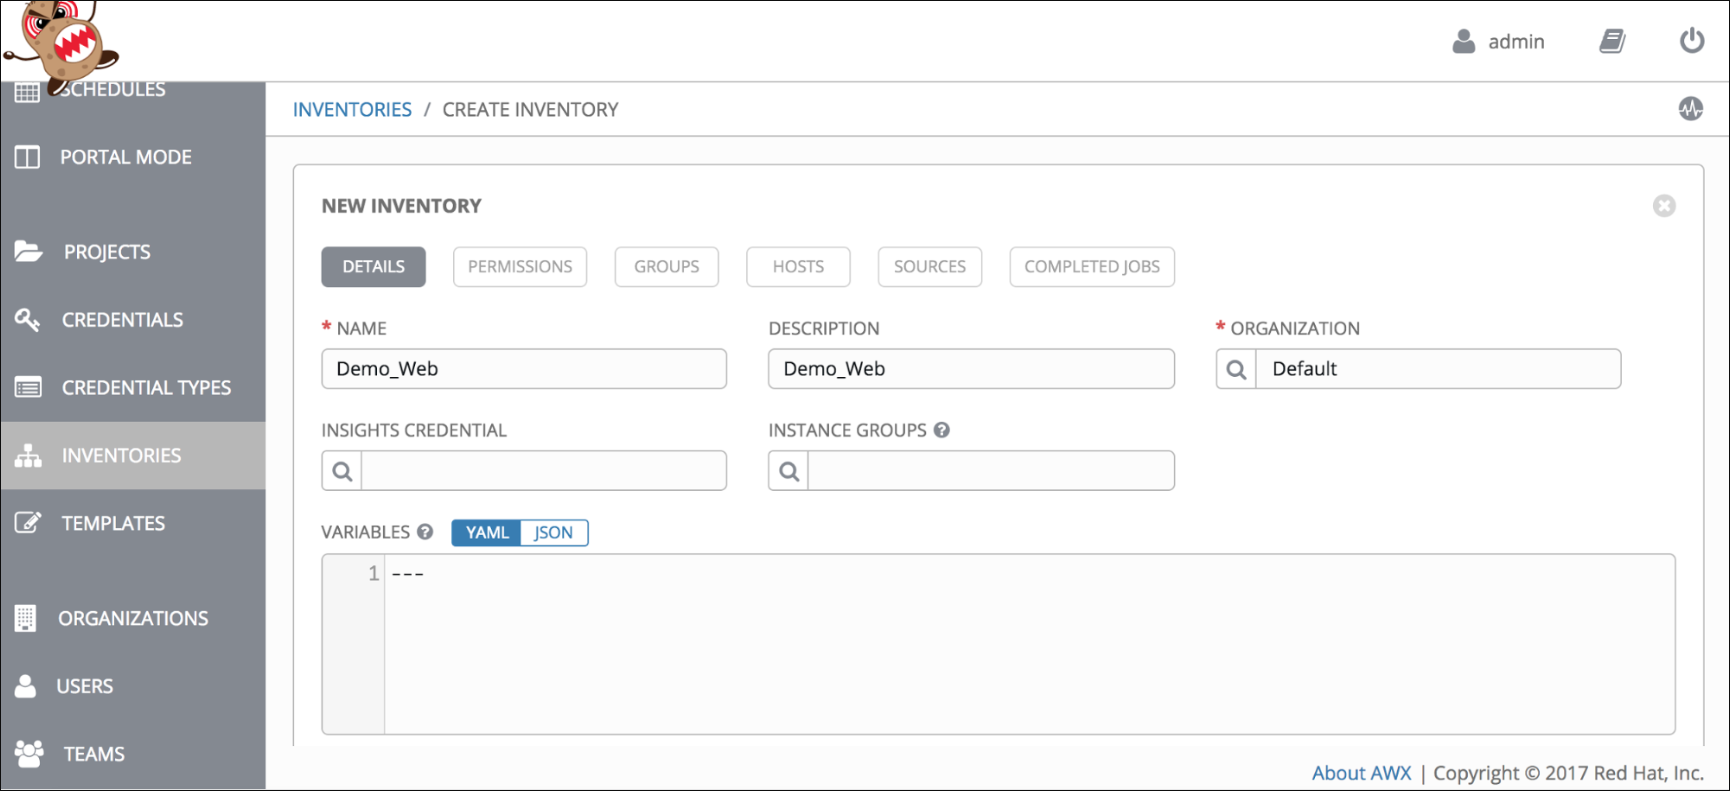
Setting up Inventories:
An Inventory is a collection of hosts against which jobs may be launched, the same as an Ansible inventory file. Inventories are divided into groups, and these groups contain the actual hosts. Groups may be sourced manually by entering hostnames into AWX or from one of the Ansible AWX-supported cloud providers.
While working with infrastructure like AWS, you can come across different scenarios where you may require to manage your inventories in different manners.
Consider a scenario where you have all your web applications running on some hosts, and you want to update SSL certificates on a group of hosts to run your SSL Playbook. For this, you need to have your web inventory created, against which you can run your job templates using AWX.
To create an Inventory:
- Click on the tab on the left, “Inventories.”
- Add new Inventory.
- AWX supports two types of inventory creation:
- Standard Inventory: It is similar to normal ansible inventory.
-
Smart Inventory: A Smart Inventory is a collection of hosts defined by a stored search that can be viewed as a standard inventory and can easily be used with job runs. Organization administrators have admin permission to add Inventories to their Organization and can create Smart Inventories.
- For this particular scenario, select Standard Inventory.
- Fill in the details like- Name and Description and save.
-
You need to save Inventory first to enable other configuration options like Sources, Hosts, Groups, and Permissions.
- Now for this particular scenario, you want to add all hosts from AWS with role web.
These are the steps to add all web instances from AWS having the tag Role: web:
AWX supports all of the major cloud sources to fetch inventory, which includes:
- Amazon EC2
- Google Compute Engine Cloud
-
Microsoft Azure

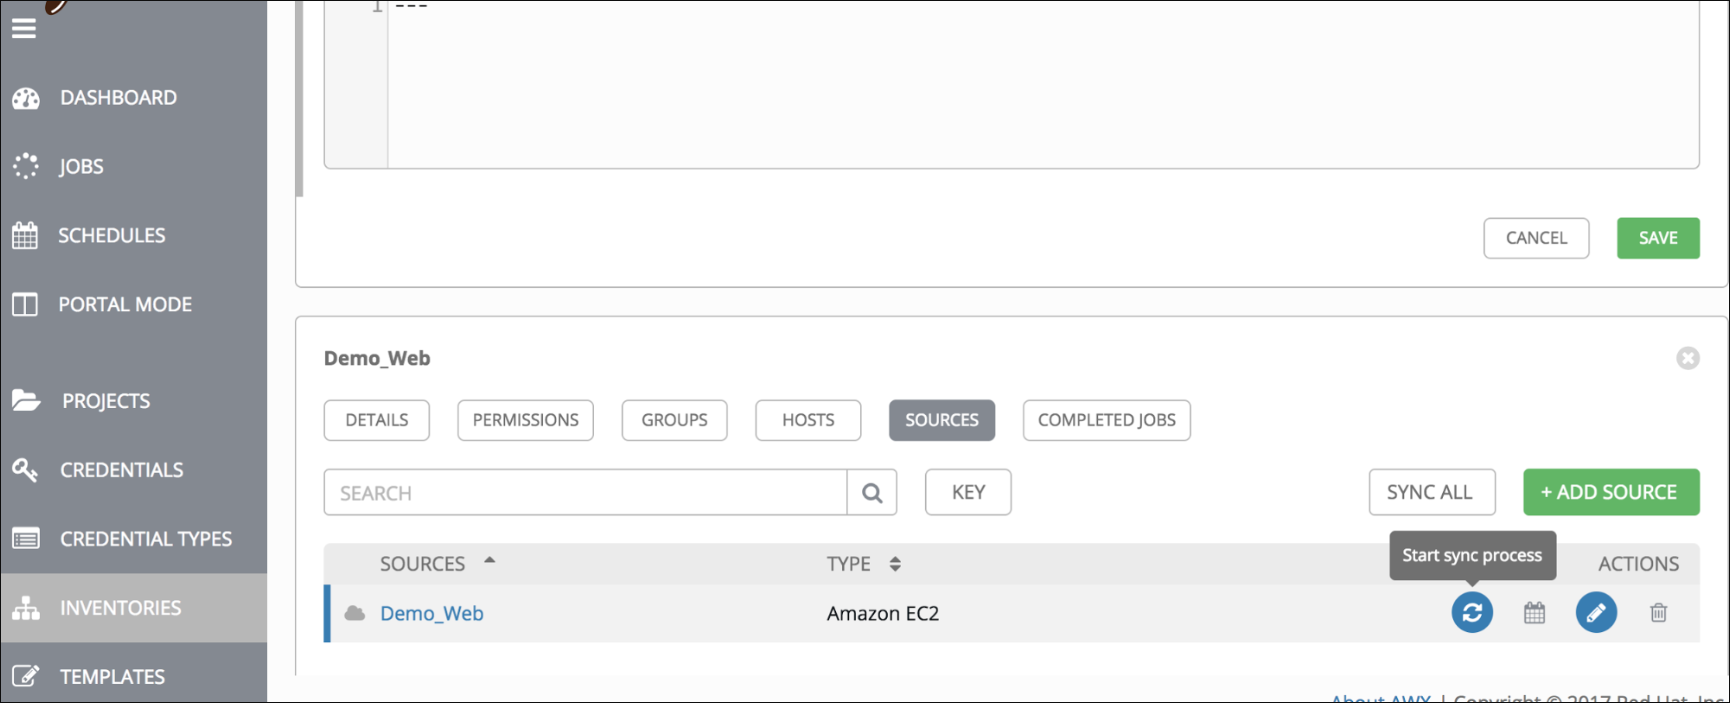
- Click on the “Sources” tab in the top right corner of the saved inventory Dialog.
-
Add new Source.

- Fill in the details to fetch “Role: web” instances from Amazon EC2.
- Here Source is Amazon EC2 (Its infrastructure filter will fetch inventory)
- In Credential, Select AWS Access Keys credentials (Added in the previous blog post).
- The most important of all is Instance Filter. Instance Filters let you filter the instances returned by the inventory script based on a variety of metadata, rather than importing your entire Amazon EC2 inventory. Hosts are imported if they match any of the filters entered.
Following examples will help you understand how you can limit hosts with Instance Filter:
- To limit to hosts having the tag TowerManaged: Enter tag-key=TowerManaged
- To limit to hosts using either the key-name staging or production: Enter key-name=staging, key-name=production
- To limit to hosts where the Name tag begins with test: Enter tag:Name=test*
- To limit to hosts where the Role tag is web: Enter tag:Role=web.
- Source Variable is also one of the options, where you can mention which attributes to filter while saving instance data in some scenarios like when you want sources to add inventory hosts using Private IP Addresses instead of Public IP Address from AWS EC2.
- Configure Source Variable.vpc_destination_variable: private_ip_address

- After filling up all the details please save sources.
- Once you save these sources, you will get these sources listed in the bottom of sources tab.
-
To sync instances just click on “start sync” and inventory will populate hosts with Role: web.
-
Once the sync is completed, you will be able to see Hosts added to HOSTS tab of Inventory.

- After this, you can run any job template against the listed inventory to configure your SSL certificates against all web hosts in your infrastructure.
This was just to give you an idea of how you can add Organizations, Users, and Teams to achieve delegations and processes within your infrastructure management. And how you can add your inventories hosts and sources to fetch in dynamic inventories instead of maintaining an old-fashioned host inventory file, which is hard to maintain. There are a lot of more exciting features and tricks AWX can empower you with; stay tuned as I will be writing about them in my next blog.