Posted By

Jenkins is a free and open-source automation server. It assists you in setting up a continuous integration or continuous delivery for various combinations of languages. Also, you can set up source repositories using pipelines and automate other regular development tasks. With Jenkins, you can organize your build, test, and deployment pipelines as per the requirements. To set up a continuous delivery (CD) pipeline, Jenkins deployed in Kubernetes Engine is normally the go-to option. It has important benefits over a standard VM-based deployment which are as follows:
- The build process uses containers, and a single virtual host runs various jobs against different operating systems.
- Building transitory executors with Kubernetes Engine allows each build to run in neat surroundings similar to the previous builds.
- Kubernetes cluster is only used when builds are active during the transition of build executors. The resources available for other cluster tasks like batch processing jobs are unaccounted.
- It builds the executor’s launch in just a few seconds.
I will try to explain how to run Jenkins inside the Kubernetes cluster and dynamically leverage the pods as Jenkins slaves with a simple demo. Before you begin, just clone the repo. You need to create a Kubernetes cluster, and for the demo, I will use GKE:

Connect to cluster and get kubeconfig by typing `kubectl config view --raw`. This kubeconfig will be used to access the K8s cluster from your local machine. After accessing the K8s cluster, use the Helm chart to install Jenkins on the GKE cluster. A Helm chart is used to deploy an application or just one component of a large application. Then, extract Helm chart values in a file to change the values as per the requirements using `helm inspect values stable/jenkins > jenkins.values`. Here is how you can install Helm. Now, open jenkins.values file in your favorite text editor. Change some values, and access the edited jenkins.values file to update the values. In the file, first, set Jenkins password and then install the required plugins. For this demo, you can use the Blueocean and kubernetes-cd plugins. In the NodePort service and IP address, disable health probes, define Jenkins agent’s image and volumes sections, and make changes in the values.yaml file. After the changes, use hostPath volume for the demo. Now, for the demo, I am using the Docker commands and for this, the Docker binaries are required in your Jenkins agent’s image. As it is important to mount volumes, mount Docker runtime from the host. You can use “deathstrock47/docker-jnlp:latest” image for the demo. The image contains official jenkins-jnlp image. I have installed Docker binaries and given sudo access to the Jenkins user. It is not recommended to give sudo access but for demo purposes, it can be provided to get started with k8s CICD.
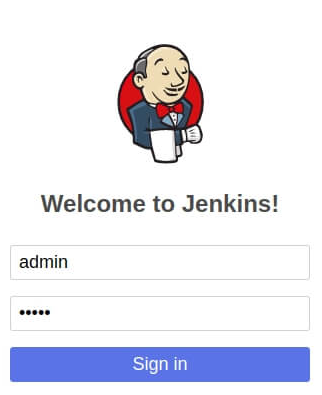
Now, install Jenkins on the k8s cluster. Use the command `helm install stable/jenkins --values jenkins.values --name jenkins --namespace jenkins`. After some time, Jenkins will be up and running. Now, access Jenkins from the browser. Do `kubectl get nodes -0 wide` and get your external-IP. Go to the browser and type “externalIP:nodePort”. After landing on the login page, enter Jenkins username and password that you have set in jenkins.values file.
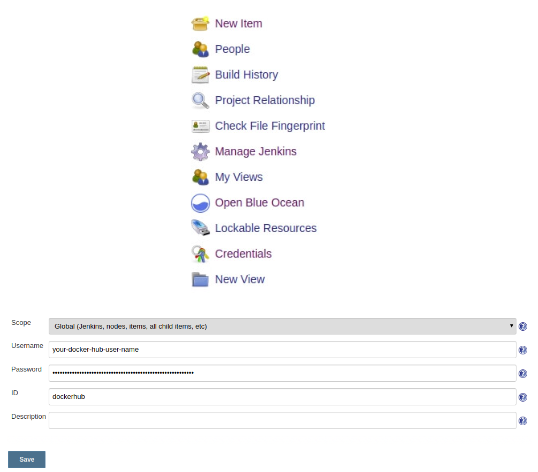
Now, go to the credentials section, and add a username and password for your Docker Hub account.
You need to add as well since you need to access the GKE cluster to deploy your app. Access the cluster and add the kubeconfig in the box as shown in the image below:
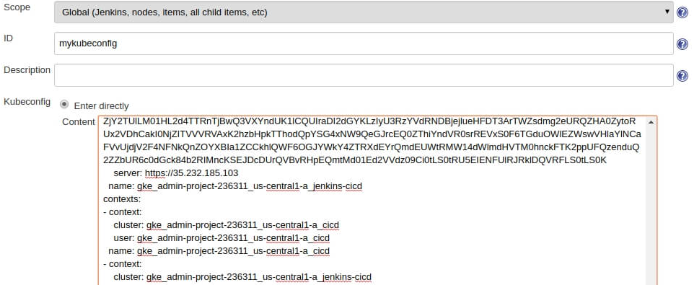
Make sure the ID you use here is the same in Jenkins file and myweb.yaml file. Next, access the Jenkins dashboard and select Open blue ocean.
Select GitHub. After selecting it, an auth token is required. Click on the link provided to generate a token. After this, select your repo, and the pipeline is created. The pipeline won’t take much time to start. Till then, go to the terminal and type `watch kubectl get pods -n jenkins`. You will notice that the agent pod is up. Once the process is over, the pod will be removed by k8s. Lastly, type `kubectl get pods`. You will see myweb-XXXXXX pod running. Grab its NodePort that you provided in myweb.yaml file. After this, go to the browser and type <external-ip>:<NodePort>. Once you type the address in the browser, the Jenkins login page will appear.
Once all the steps are executed successfully, you should be able to access the Jenkins management console.
This was about a general introduction to Jenkins and running Jenkins inside a Kubernetes cluster. In my next blog, I will be talking about deployment on Kubernetes using Jenkins and Helm charts. Stay tuned!