Posted By
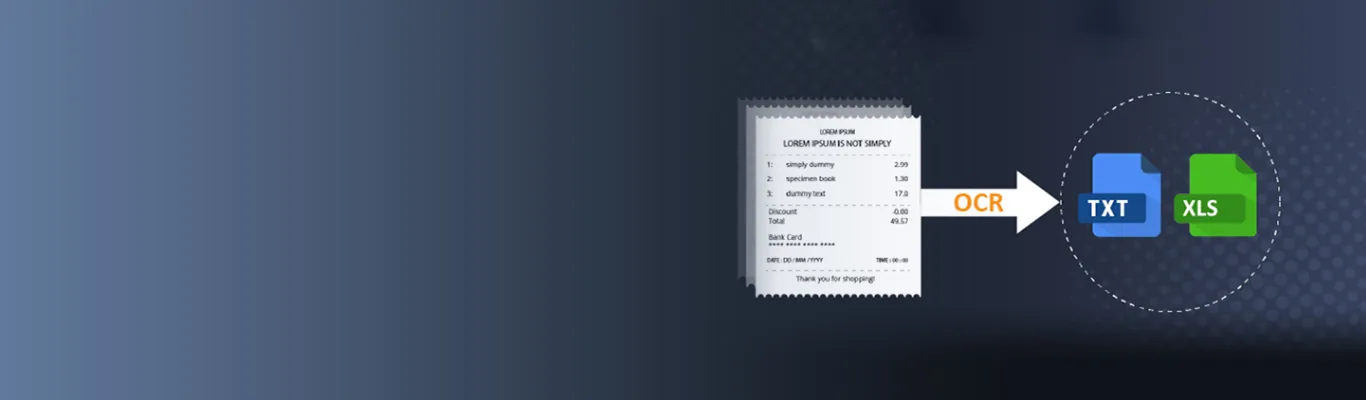
It is easy for humans to understand the contents of an image by just looking at it. You can recognize the text on the image and can understand it without much difficulty. However, computers don’t function similarly. They only understand information that is organized. And this is exactly where Optical Character Recognition comes in the picture. In my previous blog, I explained the basics of OCR and 3 important things that you should be aware of about OCR. As promised to my readers, I am back with my second blog. This time I am going to elaborate more on OCR, especially about extracting information from an image. And just like always, with automation, you can take this to the next level. Automating the task of extracting text from images will help you to maintain and to analyze records. This blog majorly focuses on the OCR’s application areas using Tesseract OCR, OpenCV, installation & environment setup, coding, and limitations of Tesseract. So, let's begin.
Tesseract OCR
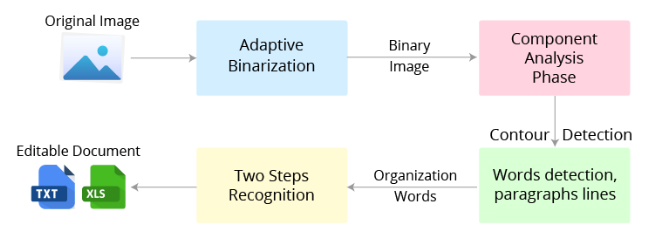
Tesseract is an open-source text recognition engine that is available under the Apache 2.0 license, and its development has been sponsored by Google since 2006. In the year 2006, Tesseract was considered one of the most accurate open-source OCR engines. You can use it directly or can use the API to extract the printed text from images. The best part is that it supports an extensive variety of languages. It is through wrappers that Tesseract can be made compatible with different programming languages and frameworks. In this blog, I’ll be using the Python wrapper named by tesseract. It is used to recognize text from a large document, or it can also be used to recognize text from an image of a single text line. Below is the visual representation of the Tesseract OCR architecture as represented in the Voting-Based OCR System research paper.
Talking about the Tesseract 4.00, it has a configured text line recognizer in its new neural network subsystem. These days people typically use a Convolutional Neural Network (CNN) to recognize an image that contains a single character. Text that has arbitrary length and a sequence of characters is solved using Recurrent Neural Networks (RNNs) and Long short-term memory (LSTM) where LSTM is a popular form of RNN. The Tesseract input image in LSM is processed in boxes (rectangle) line by line that inserts into the LSTM model and gives the output.
By default, Tesseract considers the input image as a page of text in segments. You can configure Tesseract’s different segmentations if you are interested in capturing a small region of text from the image. You can do it by assigning --psm mode to it. Tesseract fully automates the page segmentation, but it does not perform orientation and script detection. The different configuration parameters for Tesseract are mentioned below:
Page Segmentation Mode (--psm): By configuring this, you can assist Tesseract in how it should split an image in the form of text. The command-line help has 11 modes. You can choose the one that works best for your requirement from the table given below:
| mode | Working description |
| 0psm | Orientation and script detection (OSD) only |
| 1 | Automatic page segmentation with OSD |
| 2 | Automatic page segmentation, but no OSD, or OCR |
| 3 | Fully automatic page segmentation, but no OSD (Default) |
| 4 | Presume a single column of text of variable sizes |
| 5 | Assume a single uniform block that has a vertically aligned text |
| 6 | Assume a single uniform block of text |
| 7 | Treat the image as a single text line |
| 8 | Treat the image as a single word |
| 9 | To treat the image as a single word in a circle |
| 10 | Treat the image as a single character |
| 11 | Sparse text. Find as much text as possible not in a particular order |
| 12 | Sparse text with OSD |
| 13 | Raw line. Treat the image as a single text line, bypass hack by Tesseract-specific. |
Engine Mode (--OEM): Tesseract has several engine modes with different performance and speed. Tesseract 4 has introduced an additional LSTM neutral net mode that works the best. Follow the table given below for different OCR engine modes:
| OCR engine mode | Working description |
| 0 | Legacy engine only |
| 1 | Neural net LSTM only |
| 2 | Legacy + LSTM mode only |
| 3 | By default, based on what is currently available |
OpenCV
OpenCV (Open Source Computer Vision Library), as the name suggests, is an open source computer vision and machine learning software library. OpenCV was built to furnish a common infrastructure for computer vision applications. Besides this, it also accelerates the use of machine perception in commercial products. And being a BSD-licensed product, OpenCV comes in handy for businesses to utilize and modify the code. The library comprises more than 2500 optimized algorithms that have a comprehensive set of both classic and modern computer vision along with machine learning algorithms. These algorithms can be used in detecting and recognizing faces, classifying human actions in videos, extracting 3D models of objects, and many more. Here, I will use it for preprocessing, to detect the text from an image file. Tesseract requires a clean image to detect the text. This is where OpenCV plays an important role as it performs the operations on an image like converting a colored image to a binary image, adjusting the contrast of an image, edge detection, and many more.
Now, moving on to the next section, which is about installation and environment setup to carry out the OCR task.
Installation and environment setup
Here, I’ll use Python as a programming language to complete the OCR task. I will take you through the procedure of setting up the environment for Python OCR and install libraries on your Linux system.
Firstly, set up the Python environment on Ubuntu by using the command given below:
virtualenv -p python3 ocr_env
Note: Make sure you have Python version 3 or further installed on your system.
Now, activate your environment with the following command in the terminal:
source ocr_env/bin/activate
Now, you are ready to install OCR and Tesseract, use the commands mentioned below one by one:
pip install opencv-python

pip install pytesseract
Now that the installation and environment setup is finally done, let’s move to the coding part.
Coding
Here, I will use the following sample receipt image:
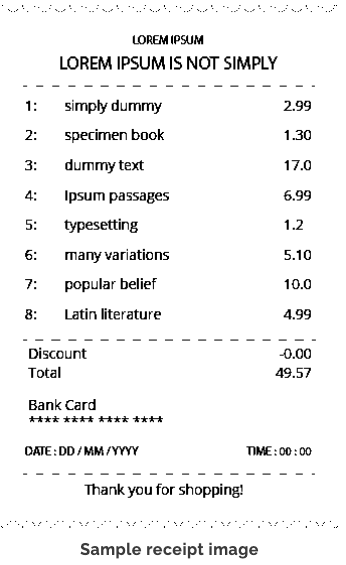
Sample receipt image
The first part is image thresholding. Following is the code that you can use for thresholding:
1| # importing modules

2| import cv2

3| import pytesseract

5| # reading image using opencv

6| image = cv2.imread(sample_image.png’)

7| #converting image into gray scale image

8| gray_image = cv2.cvtColor(image, cv2.COLOR_BGR2GRAY)

9| # converting it to binary image by Thresholding

10| # this step is require if you have colored image because if you skip this part

11| # then tesseract won't able to detect text correctly and this will give incorrect result

11|threshold_img = cv2.threshold(gray_image, 0, 255, cv2.THRESH_BINARY | cv2.THRESH_OTSU)[1]

12| # display image

13| cv2.imshow(‘threshold image’, threshold_img)

14| # Maintain output window until user presses a key

15| cv2.waitKey(0)

16| # Destroying present windows on screen

17| cv2.destroyAllWindows()
After image thresholding, the output image will be like this:
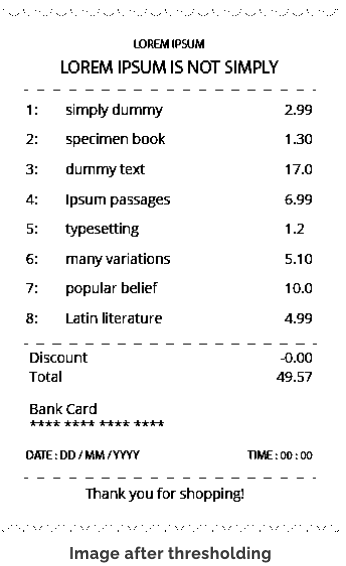
Image after thresholding
Now, you can see the difference between the original image and the thresholded image. The thresholded image shows a clear separation between white pixels and black pixels. Thus, if you deliver this image to Tesseract, it will easily detect the text region and will give more accurate results. To do so, follow the commands given below:
13| #configuring parameters for tesseract

14| custom_config = r'--oem 3 --psm 6'

15| # now feeding image to tesseract

16| details = pytesseract.image_to_data(threshold_img, output_type=Output.DICT, config=custom_config, lang=’eng’)

17| print(details.keys())
If you print the details, these are the dictionary keys that will contain relevant details:
dict_keys(['level', 'page_num', 'block_num', 'par_num', 'line_num', 'word_num', 'left', 'top', 'width', 'height', 'conf', 'text'])
The above dictionary has the information of your input image, such as its detected text region, position information, height, width, confidence score, etc. Now, draw the bounding box on your original image using the above dictionary to find out how accurately Tesseract works as a text scanner to detect the text region. Follow the code given below:
18| total_boxes = len(details['text'])

19| for sequence_number in range(total_boxes):

20| 	if int(details['conf'][sequence_number]) >30:

21| 		(x, y, w, h) = (details['left'][sequence_number], details['top'][sequence_number], details['width'][sequence_number],  details['height'][sequence_number])

22| 		threshold_img = cv2.rectangle(threshold_img, (x, y), (x + w, y + h), (0, 255, 0), 2)

23| # display image

24| cv2.imshow(‘captured text’, threshold_img)

25| # Maintain output window until user presses a key

26| cv2.waitKey(0)

27| # Destroying present windows on screen

28| cv2.destroyAllWindows()
Note: In step 20, consider only those images whose confidence score is greater than 30. Get this value by manually looking at the dictionary’s text file details and confidence score. After this, verify that all the text results are correct even if their confidence score is between 30-40. You need to verify this because images have a mixture of digits, other characters, and text. And it is not specified to Tesseract that a field has only text or only digits. Provide the whole document as it is to Tesseract and wait for it to show the results based on the value whether it belongs to text or digits.
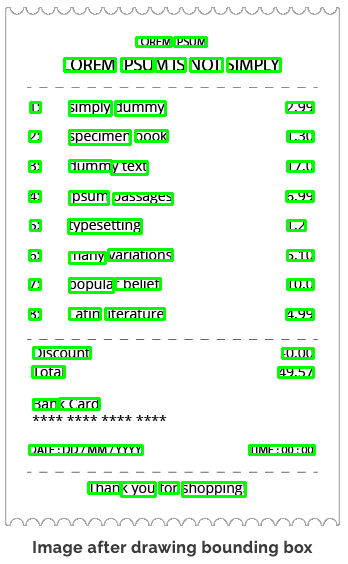
Image after drawing bounding box
Now that you have an image with the bounding box, you can move on to the next part which is to arrange the captured text into a file with formatting to easily track the values.
Note: Here, I have written the code based on the current image format and output from Tesseract. If you are using some other image format, then you need to write the code according to that image format.
The code given below is to arrange the resulting text into a format as per the current image:
29| parse_text = []

30| word_list = []

31| last_word = ''

32| for word in details['text']:

33|     if word!='':

34|         word_list.append(word)

35|         last_word = word

36|     if (last_word!='' and word == '') or (word==details['text'][-1]):

37|         parse_text.append(word_list)

38|         word_list = []
The next code will convert the result text into a file:
39| import csv

40| with open(result_text.txt',  'w', newline="") as file:

41|     csv.writer(file, delimiter=" ").writerows(parse_text)
It's time to compare the output text file and the input image.
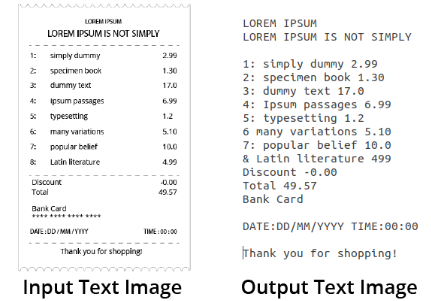
Now, if you compare both images, it can be inferred that almost all the values are correct. Thus, it can be said that in the given test case, Tesseract produced around 95% accurate results, which is quite impressive.
However, Tesseract has some limitations. Let’s see what those are.
Limitations of Tesseract
- The OCR’s accuracy is not as apt as compared to some currently available commercial solutions.
- It is not capable of recognizing handwritten text.
- If a document contains languages that are not supported by Tesseract, then the results will be poor.
- It requires a clear image as input. A poor-quality scan may produce poor results in OCR.
- It doesn’t give accurate results of the images affected by artifacts, including partial occlusion, distorted perspective, and complex background.
- It is not good at analyzing the normal reading order of documents. For example, you might fail to recognize that a document contains two columns and might try to join the text across those columns.
- It does not expose the font family’s text information.
In the end, it can be concluded that Tesseract is perfect for scanning clean documents, and you can easily convert the image’s text from OCR to Word, pdf to Word, or to any other required format. It has pretty high accuracy and font variability. This is very useful in case of institutions where a lot of documentation is involved such as government offices, hospitals, educational institutes, etc. In the current release, 4.0, Tesseract supports OCR-based deep learning that is significantly more accurate. Access the OCR code and input image from the GitHub repository to extract text from image or PDF files.Try replicating this task and achieve the desirable results. Happy coding!


Related Blogs