Posted By
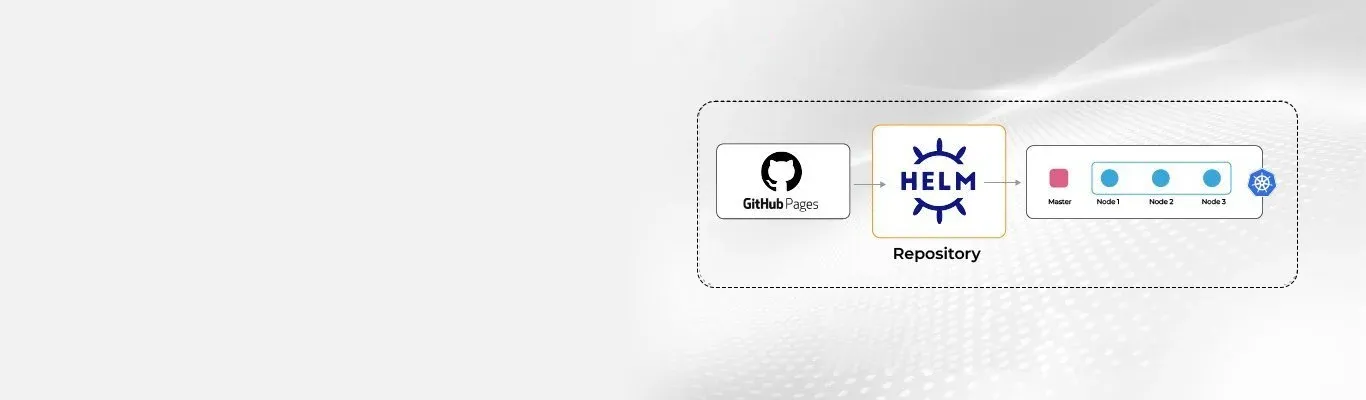
Helm is slowly becoming a popular choice for managing Kubernetes applications. It is a Kubernetes deployment tool for packaging, automating, creating, deploying, and configuring services and applications to Kubernetes clusters. Helm simplifies application deployments on Kubernetes, not only because it facilitates the application release phase but also because Helm makes it possible to manage variables in the Kubernetes manifest YAML files easily. GitHub is a popular resource among developers where they share code and work together on open-source projects. This online software development platform can store, track, and help collaborate on software projects quickly and efficiently.
Before we go ahead, we also need to know the term - Helm charts. Helm uses a format for packaging called Helm charts. Helm charts contain files that help you upgrade, define, or install Kubernetes applications. Once the charts are ready to share, the most straightforward step is to upload them to a chart repository. A Helm chart repository allows us to host and share Helm packages. For this, any HTTP server will do. Unfortunately, Helm doesn’t include a native tool to upload charts to a remote chart repository server. And this is precisely why we use GitHub Pages to share our charts.
GitHub Pages use-case:
GitHub is an exciting choice to host your personal, organizational, and project sites. With GitHub Pages, you can quickly create a site from your GitHub repositories — a great way to share static content related to your repositories like apps, portfolios, and project blogs. Read more in the GitHub Pages documentation.
Prerequisites:
Before we begin creating the Helm Repository Using GitHub, you must know how to create a branch on GitHub, commit changes using Git, and understand Helm charts.
Let’s start with creating a public Helm chart repository.
Step 1: Create a folder and a GitHub repository
Create a folder and a GitHub repository using the following command:
mkdir public-Helm-charts && cd public-Helm-charts
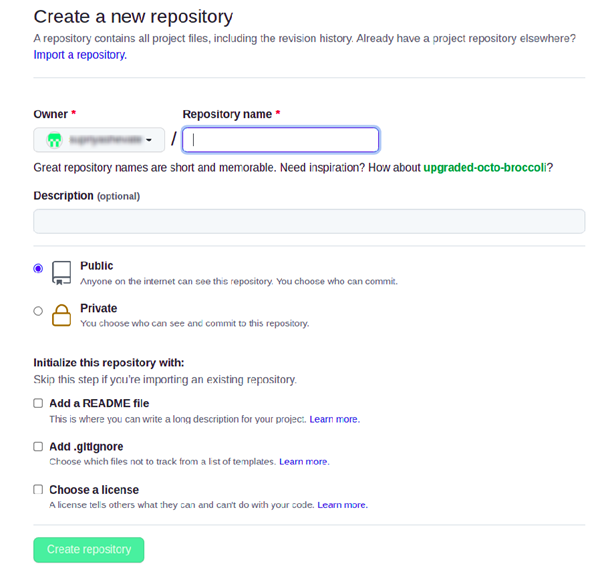
Create a Public GitHub repository.
Step 2: Clone the GitHub repository
Clone your GitHub repository in this folder:
git clone <github_repository_path>

Here, my GitHub repository name is my-helm-charts
cd my-helm-charts/
I will be creating a charts folder and placing my Helm charts in this folder (This is optional)
mkdir charts && cd charts

As shown in the above image, create a Helm chart or copy your existing app/service Helm chart inside the charts folder.
Here you can store multiple charts. For now, I will create a public Helm chart repository with a single Helm chart, as shown in the above image.
Use the helm lint command to test the Helm chart locally:
helm lint <path_to_helm_chart_dir>

Step 3: Add robots.txt at the root location of the repository
This will avoid bot crawling on the Helm repository.
echo -e “User-Agent: *\nDisallow: /” > robots.txt

Step 4: Package your Helm chart
You need to create a .tgz file of Helm chart at root location and to do so use the following command:
Helm package charts/observability-service/

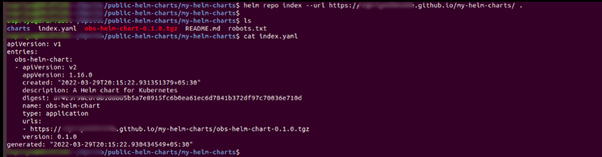
Step 5: Finally, create the index.yaml file for the Helm repository
Use the following command to create the index.yaml file:
Helm repo index --url <github_repository_path> .
Note: If you make any further changes in the Helm chart, you must regenerate the index.yaml file and the .tgz file with the latest changes as mentioned in Steps 5 and 6.
However, you can use --merge flag to add new charts to an existing index incrementally.yaml:
helm repo index --url <github_repository_path> --merge index.yaml .
Read more in the Helm Repo Index documentation.
Step 6: Push the code to GitHub repository
git status

git add .

git commit -m "your_commit_message"
git push
Step 7: Create GitHub Pages once the code is pushed to GitHub

Go to settings of your GitHub repository -> Pages:
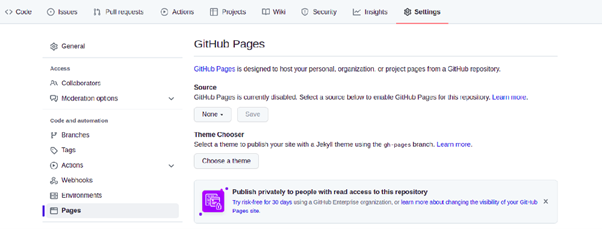
Select your branch in the Source section.
Click on Save.
You will find a link for your public Helm chart repository.
Click on the link and wait for some time to see your README.md contents on the screen, as shown below.

Step 8: Add Helm repository locally
For this, use the following command:
Helm repo add myrepo <github_repository_path>
Where ‘myrepo’ is the local repository name.
To check your repository Helm charts and its versions, use:
Helm search repo myrepo

Step 9: Install this Helm chart into your cluster
To install Helm charts into cluster use:
helm install <release> myrepo/obs-helm-chart -n <namespace>
Check your pods and services:
kubectl get po -n <namespace>

kubectl get svc -n <namespace>
Chart Cleanup and Helm Rollback
Finally, to remove all the resources associated with the last release of the chart as well as the release history, freeing it up for the future, use the following command:
helm delete <release> -n <namespace>
And for Helm Rollback and to see revision numbers, run:
Helm history RELEASE –n <namespace>

helm rollback <release> [REVISION] -n <namespace>
Now coming to the business end - here are the advantages of using GitHub for creating the Helm repository:
- You can serve all static websites directly from the repository.
- It supports custom domains. You are allowed to host a static website on GitHub pages at no cost. It deploys straight from Git.
- And it provides a secure hosting environment.
However, there are some limitations too, such as:
- GitHub Pages sites come with a bandwidth size limit of 100GB/ month.
- Repos must not be more than 1 GB in size.
- Only GitHub Pro, GitHub Enterprise Cloud, GitHub Team, and GitHub Enterprise Server allow you to add GitHub Pages for a private GitHub repository.
Considering the advantages, I recommend using GitHub to create Helm Repository. I have configured a public Helm repository using GitHub Pages and GitHub repository. Try it once; if you still think you have difficulties with creating that, feel free to comment below, and I will be more than happy to help you.