Posted By
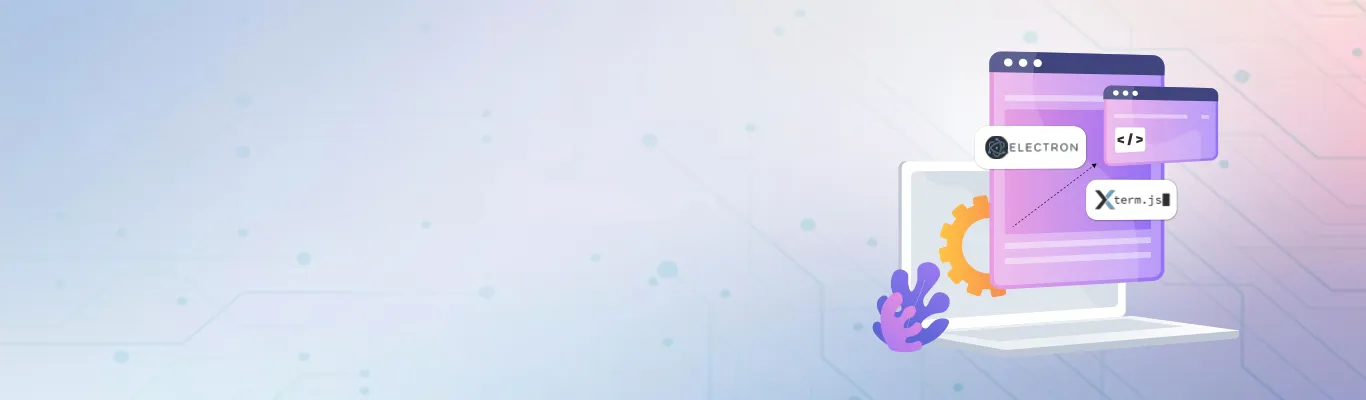
The need for remote access and management of servers and applications is ever-growing in today's world. Occasionally, a customized requirement emerges wherein we find the necessity for a terminal that facilitates remote access from within our own web-based applications. Browser-based terminals using Xterm.js and Electron.js allow developers to create interactive terminal interfaces that work seamlessly in desktop apps. Let's understand a bit more about web-based terminals.
Why do we need a terminal in a web browser?
Instead of distributing server access via keys, there is an option to provide individuals entry to a browser-based terminal located behind a secure login interface. This login interface remains under admin control. For example, Digital Ocean provides browser-based terminal access to droplets and Play with Docker provides terminal access to containers right within the browser.
When working with developer tools, it's common to need an embedded terminal. Browser-based terminals provide developers with remote access directly from the browser, integration with Electron.js applications, and the ability to enhance developer productivity. We can manage deployments and debug applications efficiently without switching tools.
Understanding Electron.js
Electron.js is an open-source framework that allows developers to create cross-platform desktop applications using web technologies like HTML, CSS, and JavaScript. It essentially wraps a web application inside a native shell, enabling developers to build Windows, macOS, and Linux applications with the same codebase.
Set up your project
To begin, ensure to have Node.js and npm (Node Package Manager) installed on the system. Create a new directory for your project and navigate to it in the terminal. Run the following commands to initialize your project and install Electron:

Design the terminal interface
Create an `index.html` file in the project directory. This will serve as the primary user interface for the browser-based terminal. Design it like a regular web page, adding necessary HTML and CSS elements to create a terminal-like appearance.
Integrate the terminal emulator
To emulate the terminal functionality, you'll need a terminal emulator library. One popular choice is Xterm.js, a powerful and customizable terminal emulator for the web. Install it using npm:
Integrating browser-based terminals into production environments can be challenging. Opcito’s Containerization services help organizations deploy and manage these terminals securely within CI/CD pipelines, improving reliability and developer efficiency

In your index.html file, include the necessary script and stylesheet tags for xterm.js. Create a container element where the terminal will be rendered:

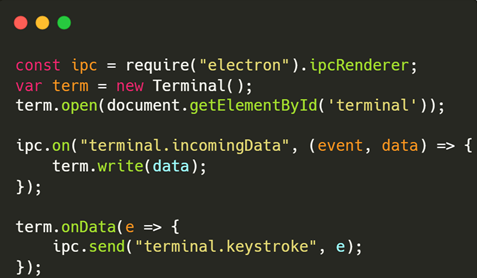
Entry point Index.js
This is the application's entry point where, with the help of ipcRenderer, we can view events for the incoming data.
The ipcRenderer module provides explicitly a way for the renderer process to send and receive messages to and from the primary process. This is crucial for scenarios where it is essential to share data, trigger actions, or synchronize the state between the main and renderer processes.
Create a preload.js
Create the preload.js file, which can be preloaded to get control of the active browser window. In Electron, the remote module allows users to interact with the main process from a renderer process and access specific modules and functionality typically only available in the main process. The BrowserWindow class in Electron is used to create and manage browser windows (windows in the Electron application).
These windows can be created in the main process. So, remote.BrowserWindow.getFocusedWindow() would potentially be a method that allows for the retrieval of a reference to the currently focused or active BrowserWindow instance from the main process. This could be useful to perform actions on the active window from a renderer process.

Implement command execution
In the main Electron JavaScript file (usually named `main.js`), set up the Electron window and load the `index.html` file.
Using xtermjs and node-pty is even simpler in Electron. As the renderer process can run node modules, it is possible to directly create and pass data between xtermjs and node-pty without using any socket library. Here is a simple example:


When scaling browser-based terminals, it’s important to monitor performance, secure sessions, and optimize for concurrent users. AI and automation can enhance these processes! Learn more in our blog on AI-powered Kubernetes automation.
Building your application:
Once the browser-based terminal application is refined, it's time to build it. Use tools like `@electron/rebuild` to build the files, which will create the platform-specific builds and run the application.
To include I would say creating a browser-based terminal using Electron.js opens up remote administration, education, or personal productivity possibilities. With the power of web technologies and Electron.js, you can combine a web application's convenience with a terminal interface's versatility. I hope this blog will help you get a comprehensive idea, from setting up the project to implementing advanced features to customize, expand, and make the most out of your browser-based terminal application.
Opcito’s experts can help organizations implement these solutions efficiently and securely. Reach out to us at contact@opcito.com for guidance and support.