


Kickstarting your Node.js with Spanner
Node JavaScript or Node.js is an open source, cross-platform, runtime environment for executing JavaScript code outside a browser. Node.js is often used to build back-end services which are nothing but the APIs. A backend is an application running on a server or on the cloud to store data, send emails or push notifications, and kick off workflows. Node.js is ideal for building highly scalable data-intensive and real-time back-end services that can boost your applications. Also, if required, the backend can serve to the backend. Apart from Node.js, there are other frameworks available for building back-end services like Rails, Django, Flask, etc. So, what’s so special with Node.js that makes it stand out of the league of backend development tools?
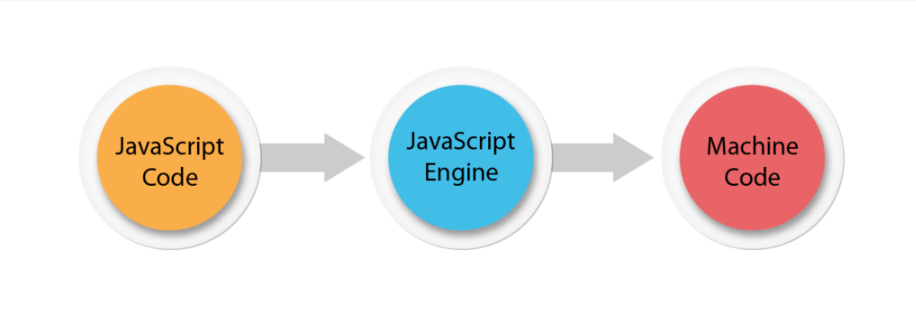
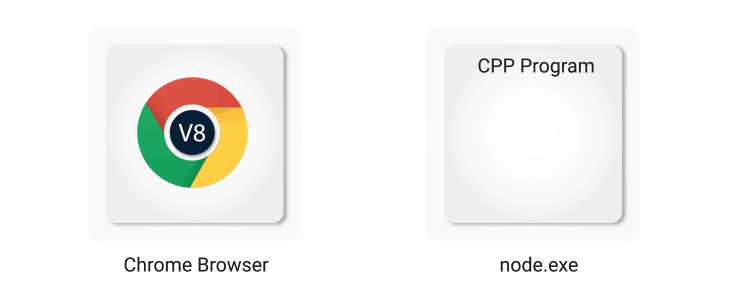
Node.js is a runtime environment for executing JavaScript code. But what is a runtime environment? Actually, before Node, JavaScript was used to build applications that could be run only inside a browser. In the background, a JavaScript engine attached to the browser converts the input JavaScript code into code that a computer can understand.
Here are a few examples of JavaScript engines integrated with popular browsers:
- Rhino - Managed by the Mozilla Foundation, open source, developed entirely in Java
- SpiderMonkey - First JavaScript engine that powered Netscape Navigator and powers Firefox today
- V8 - open source, developed by Google in Denmark, part of Google Chrome and Node.JavaScript
- JavaScriptCore - open source, marketed as Nitro and developed by Apple for Safari
- KJS - KDE's ECMAScript/JavaScript engine originally developed by Harri Porten for the KDE project's Konqueror web browser
- Chakra (JScript9) - for Internet Explorer
- Chakra (JavaScript) - for Microsoft Edge.
How does Node.js work?
Node.js is asynchronous in nature. It means a single thread is allocated to handle multiple requests. Let me tell you the difference between asynchronous and synchronous calls. Synchronous architecture, which is also known as blocking architecture, serves a single request at a time. The request may need database communication and business logic flow, and then it sends a response to a client machine. Meanwhile, if any other request comes, that request has to wait until the first one is processed. This might look like unharming on a low scale or naive program but consider a scenario where thousands of requests are coming continuously from concurrent clients. On the other hand, asynchronous or non-blocking architecture works on multiple threads to use resources efficiently which ultimately results in less latency and increases the performance of the application.
This was all about Node.js and how it works. Now, here comes my favorite part, coding. In this segment, I will be talking about how you can scale up your microservice using Express.js and GCP Spanner database. Cloud Spanner is a database service from Google Cloud that combines the benefits of both relational and nonrelational databases such as scalability, availability, and consistency, and at the same time provides you with automated replication. Node.js enables developers with a javascript with which they can work on both backend and frontend. So using Node.js and Cloud Spanner, I will try to explain the following:
- Creating a microservice using Node.js
- Declaring endpoints in Express
- Middleware in Express, using it endpoint specific and globally
- Fetching data from GCP Spanner.
You can download and install Node here - https://nodejs.org/en/
Use the following command to check the node version:
$ node -v

#O/P = v9.11.1
Now, initialize the project. Create a folder and open the same path on a terminal. Run npm init -y to initialize the project. ‘-y’ flag is to take all default values. If you want to specify values implicitly in a project, such as name, version, repo, etc, you can run npm init.
The following command will create package.json in the root folder:
{

  "name": "my-sen-app",

  "version": "1.0.0",

  "description": "",

  "main": "index.js",

  "scripts": {

    "test": "echo \"Error: no test specified\" && exit 1"

  },

  "keywords": [],

  "author": "",

  "license": "ISC"

}
Install Express and Spanner Node modules
These commands will install Express and GCP spanner libraries in your project:
$ npm install express --save

$ npm install @google-cloud/spanner --save
To ensure the installation is complete, check package.json. The dependencies part will look like this:
"dependencies": {

    "express": "^4.16.3",

    "@google-cloud/spanner": "^1.4.0"

  }
What is Express.js?
Express.js is a Node.js web application server framework designed to build single-page, multi-page, and hybrid web applications. It is the de facto standard server framework for Node.js.
Now, let’s create a server listening port and scale the server. Create index.js file and add the following content to the file.
const express = require(“express”);
const app = express();
app.listen(3000, () => {
    console.log(“Server is running on port 3000”);
});
To make sure that the server is accessible to your browser, run the localhost address on your browser. The page will show “Cannot GET /” which means the server is accessible to your browser. But, now the endpoint is not accessible “/”, because no endpoint is created yet. For this, you have to create an endpoint “/”.
The following code will initialize the “/” GET endpoint, which returns “Hello World”:
app.get('/', (req, res) => {

    res.send('Hello World')

})
Run localhost address. The endpoint will return the “Hello World” text. If you are getting this response then congratulations, your server setup is working smoothly.
Let’s move forward and make an endpoint that will fetch records from the Spanner database.
What is Spanner, and how to read data from Spanner database?
Spanner is the first horizontally scalable, strongly consistent, relational database service. Horizontal scalability is the ability to increase capacity by connecting multiple hardware or software entities so that they work as a single logical unit. Whereas, a relational database service means a collective set of multiple datasets organized by tables, records, and columns. Ultimately, this blog will help you with how you can use Spanner database in your service.
Next, you have to create a user.js and include google/spanner node_module in your code.
const Spanner = require('@google-cloud/spanner');
Use the following command to create a Spanner client and declare few constants in order to initialize and communicate between Google Cloud Platform and your application like database, GCP instance, and project:
// Creates Spanner client

const spanner = new Spanner({

  projectId: process.env.projectId, // Environment variable assigned here

});
// Initialize Spanner instance
const instance = spanner.instance(process.env.instanceId); // Environment variable assigned here
const databaseId = process.env.databaseId; // Environment variable assigned here
// Initialize database
const database = instance.database(databaseId);
Now that you have completed Spanner connection initialization successfully, you can start with table records from Spanner using Node.
1) Initialize User constructor and expose a getAllUsers() function which will be used to fetch user records:
// Initialize User constructor

var Users = function () {}
// Expose getter function to get all users
Users.prototype.getAllUsers = async function() {
}
module.exports = Users
Now you have a Spanner instance created and connected to the GCP service. You can use the instance and fetch user details from Spanner database. It is always good to write code in `try catch` block. It will help to debug easily without unexpected termination of applications.
Add the following code in getAllUsers() function:
try {

    const query = {

        sql: 'SELECT firstName, LastName, age FROM users',

    };

    let result = await database.run(query);

    if (result[0]) {

        var rows = result[0].map((row) => row.toJSON());

        return rows;

    } else {

        return null

    }

}catch (err) {

    throw("error in getAllUsers function", err)

}
To access the users module, add the following code at the end of the file:
module.exports = Users
Then, include express node_module, which is already installed, and create an object of it using:
const express = require('express');

const app = express();
Now you have a complete Node.js nodule, and your final user.js file will look like this:
// Imports the Google Cloud client library

const Spanner = require('@google-cloud/spanner');
// Creates spanner client
const spanner = new Spanner({
projectId: process.env.projectId,
});
// Initialize spanner instance
const instance = spanner.instance(process.env.instanceId);
const databaseId = process.env.databaseId;
// Initialize database
const database = instance.database(databaseId);
// Initialize User constructor
var Users = function () {}
// Expose getter function to get all users
Users.prototype.getAllUsers = async function() {
try {
const query = {
sql: 'SELECT firstName, LastName, age FROM users',
};
let result = await database.run(query);
if (result[0]) {
var rows = result[0].map((row) => row.toJSON());
return rows;
} else {
return null
}
}catch (err) {
throw("error in getAllUsers function", err)
}
}
module.exports = Users
The next thing is to declare show-users endpoint and display user details. Go back to index.js and declare endpoint:
app.get('/show-users', (req, res) => {
})
At the top of the file, call user module:
const users = require("./user.js");
Now, initialize user module and call the showAllUsers() function. Catch the returned value from the function and render it to the browser using the res variable:
try {

    user = new users();

    let data = await user.getAllUsers()

    if (data == null) {

        res.status(404).send("No record found")

    }

    res.send(data)

}catch (err) {

    res.stats(500).send({err})

}
In addition to this, you can use middleware functions to validate URL parameters, data, or login authentication/token.
There are two ways to implement middleware function:
1) Globally - middleware that is globally applicable to all the endpoints out there in your router:
// Add global middleware applicable for all endpoints

app.use(function(req, res, next) {

   console.log("in global middleware function");

   if (!req.headers.token) {

      throw("No authentication token provided");

   }

   next();

});
2) Endpoint specific - middleware functions which are applicable only to specific endpoints:
// Add scoped middleware for all-users endpoint

app.use('/all-users', function(req, res, next) {

   console.log("in scoped middleware function of /all-users");

   if (!req.headers.admin_token) {

      throw("No admin authentication token provided");

   }

   next();

});
Your final index.js will look like this:
const express = require('express');

const app = express();

const users = require("./user.js");
// Add scoped middleware for all-users endpoint

app.use('/all-users', function(req, res, next) {

   console.log("in scoped middleware function of /all-users");

   if (!req.headers.admin_token) {

      throw("No admin authentication token provided");

   }

   next();

});


// Add global middleware applicable for all endpoints

app.use(function(req, res, next) {

   console.log("in global middleware function");

   if (!req.headers.token) {

      throw("No authentication token provided");

   }

   next();

});


// Root endpoint

app.get('/', (req, res) => {

   res.send('Hello World!!!')

})


// Get all user endpoint

app.get('/all-users', async (req, res) => {

   try {

      user = new users();

      let data = await user.getAllUsers()

      if (data == null) {

         res.status(404).send("No record found")

      }

      res.send(data)

   }catch (err) {

      res.status(500).send({err})

   }

})


app.listen(3000, () => {

    console.log('Server is running on port 3000');

});
That’s it. Now, run `node index.js` and you will be able to access http://localhost:3000/all-users endpoint.
This is just a sample code to set up a Node microservice using Express. You will find that there is a lot more to it that you can explore once you start with it. Node.js allows developers to work with JavaScript for both frontend and backend, making it convenient to communicate between the server and the client. Node.js is open source. Hence, it gives an edge with a shared repository of dynamic tools and modules. The luxuriant open source community has delivered many outstanding modules. Combine this with the consistency of Cloud Spanner, and you have a perfect mix. As technology grows, we will get more tools and environments for application development and more ways to explore. But at the moment, Node provides a good backend environment to develop an application.